Events
In the context of the Blackwall platform, Events are the actions, activities, or occurrences that the platform tracks and analyzes to determine whether traffic is generated by a human or a bot. Events are fundamental to Blackwall's detection capabilities, as they provide the raw data needed to make critical decisions about suspicious or malicious behavior. To access and view Events for the selected assets, perform the following tasks:
- Ensure that you are logged into your Blackwall account.
- From the main navigation menu bar, select Websites and then click Settings beside the website asset that you wish to view events for.
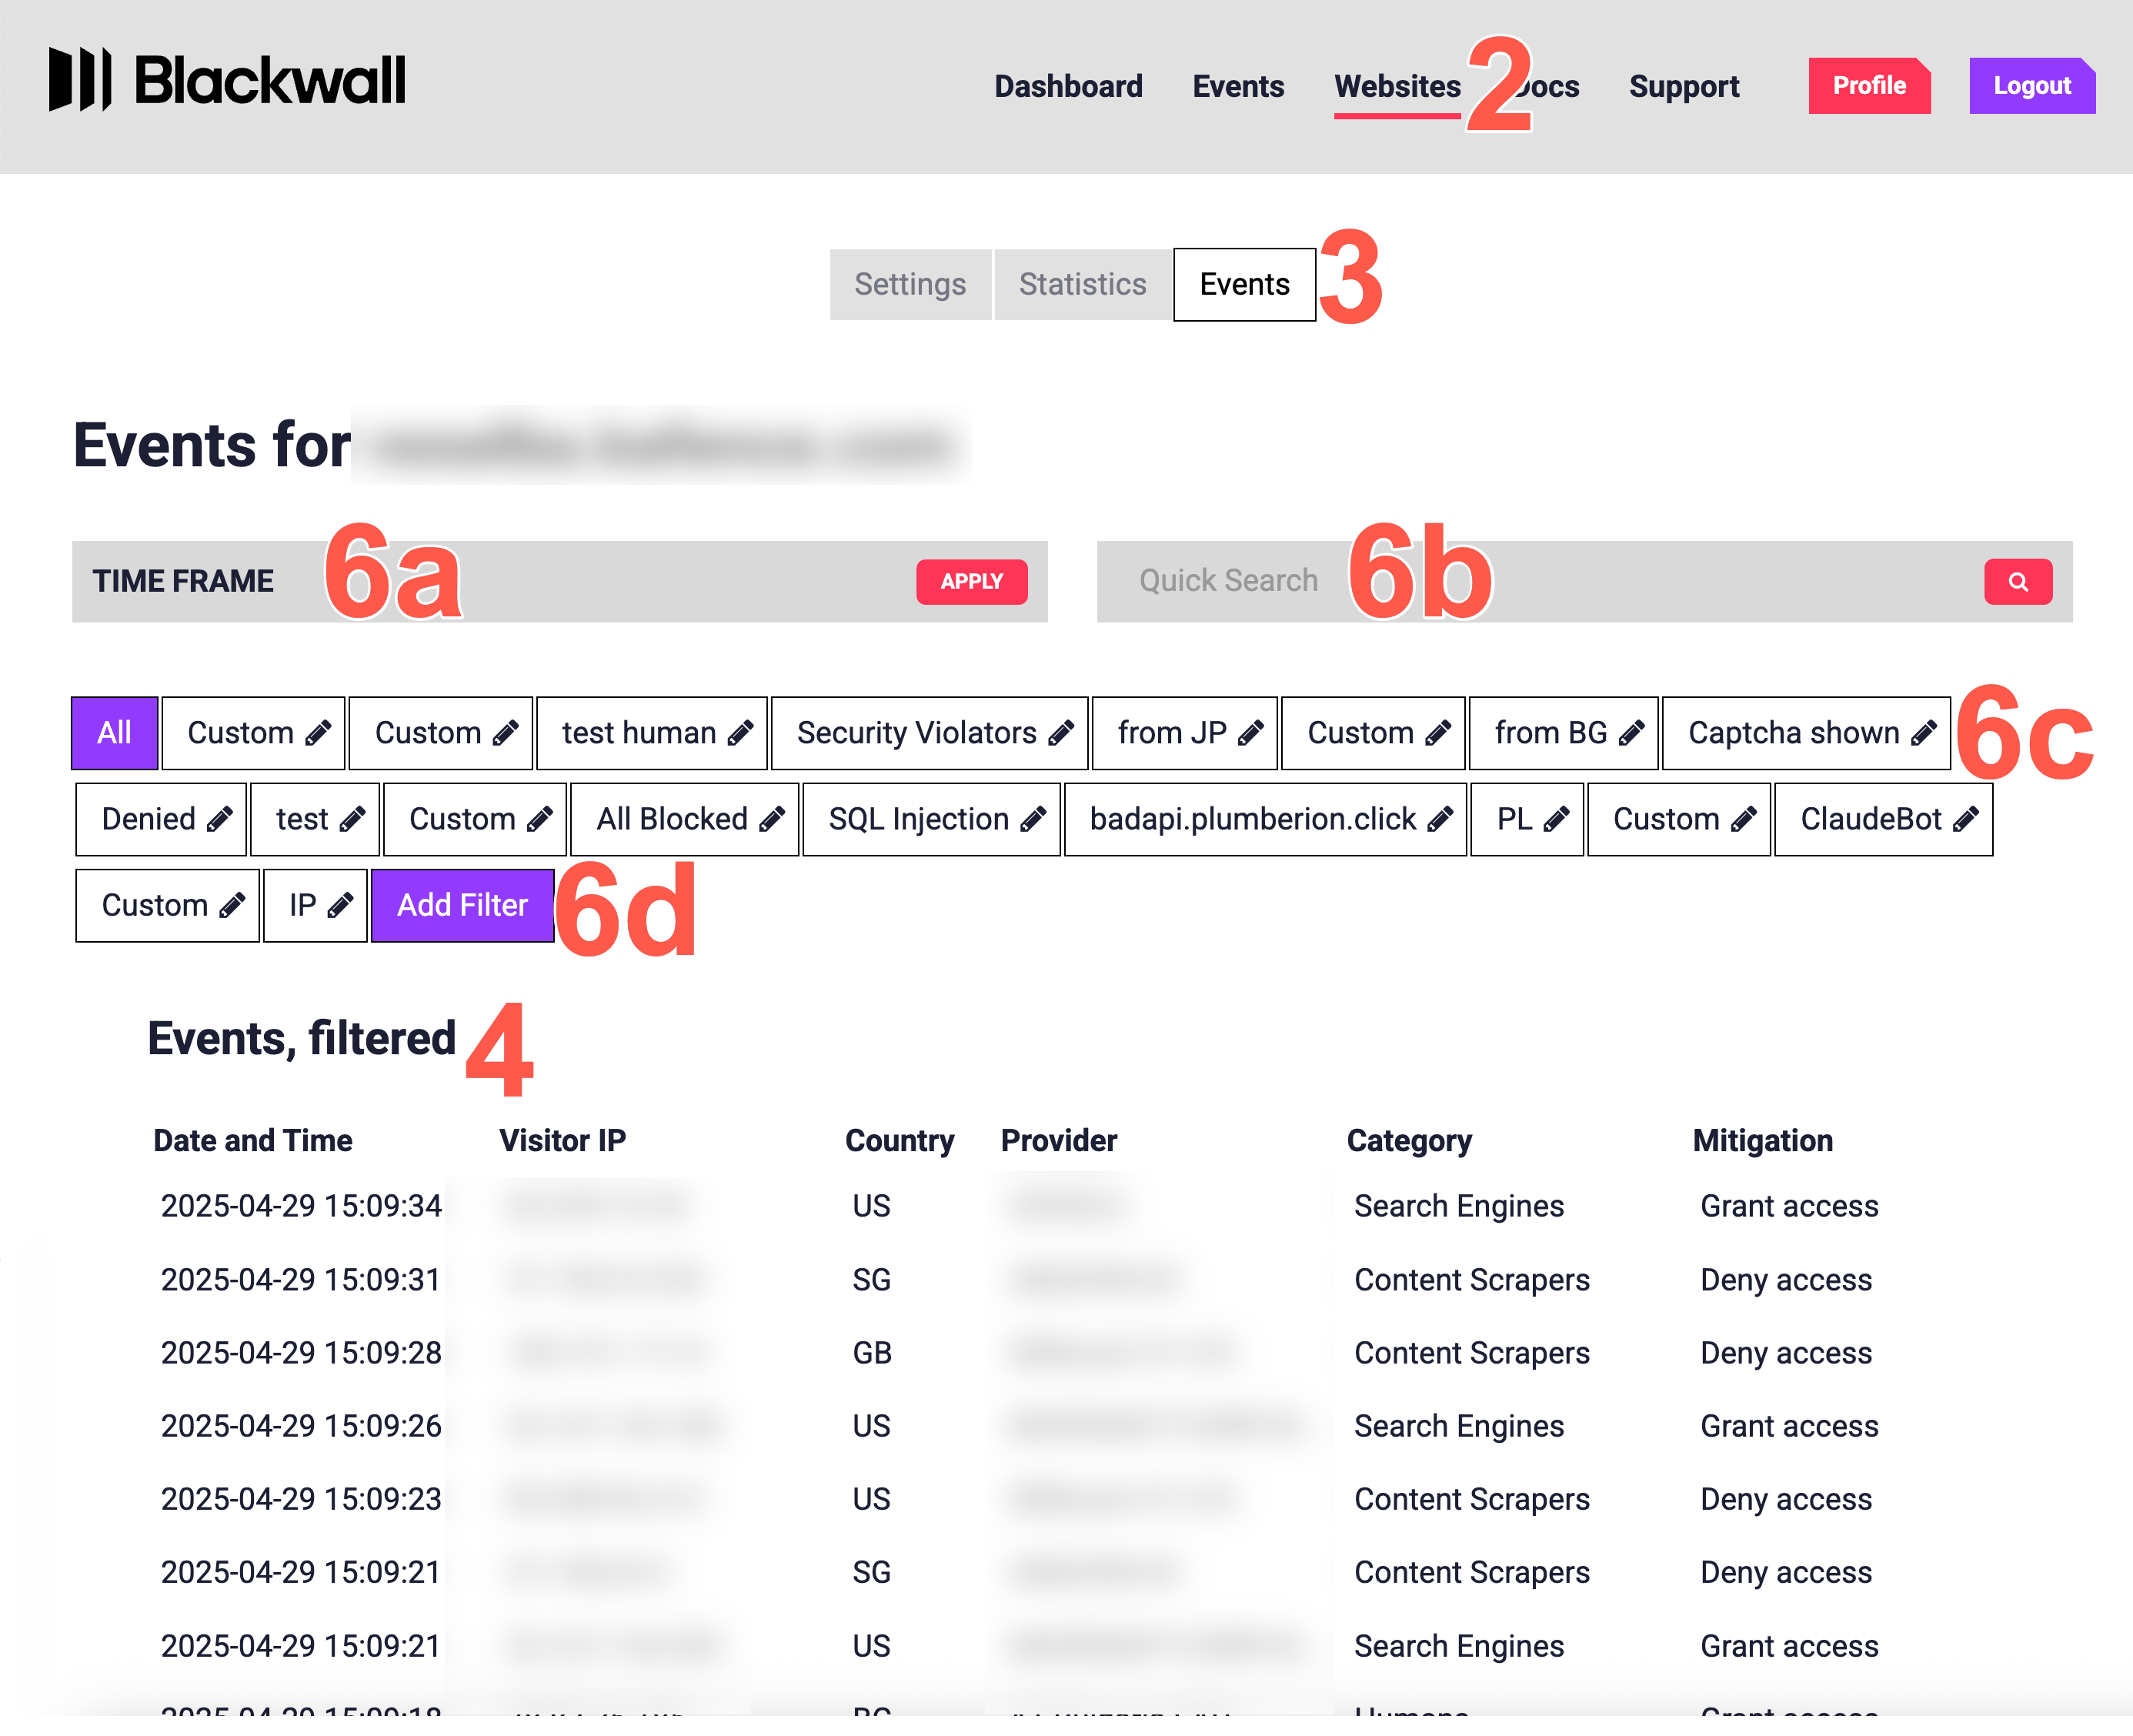
- In the secondary menu, select Events.
- View all traffic events in the table.
- Optionally, click Load More to load more results into the visible events table.
- Optionally, use one of the following filtering methods to filter the results in the table:
- Use the date selector to filter by date range:
- Click the TIME FRAME field, which displays a calendar date/time selector.
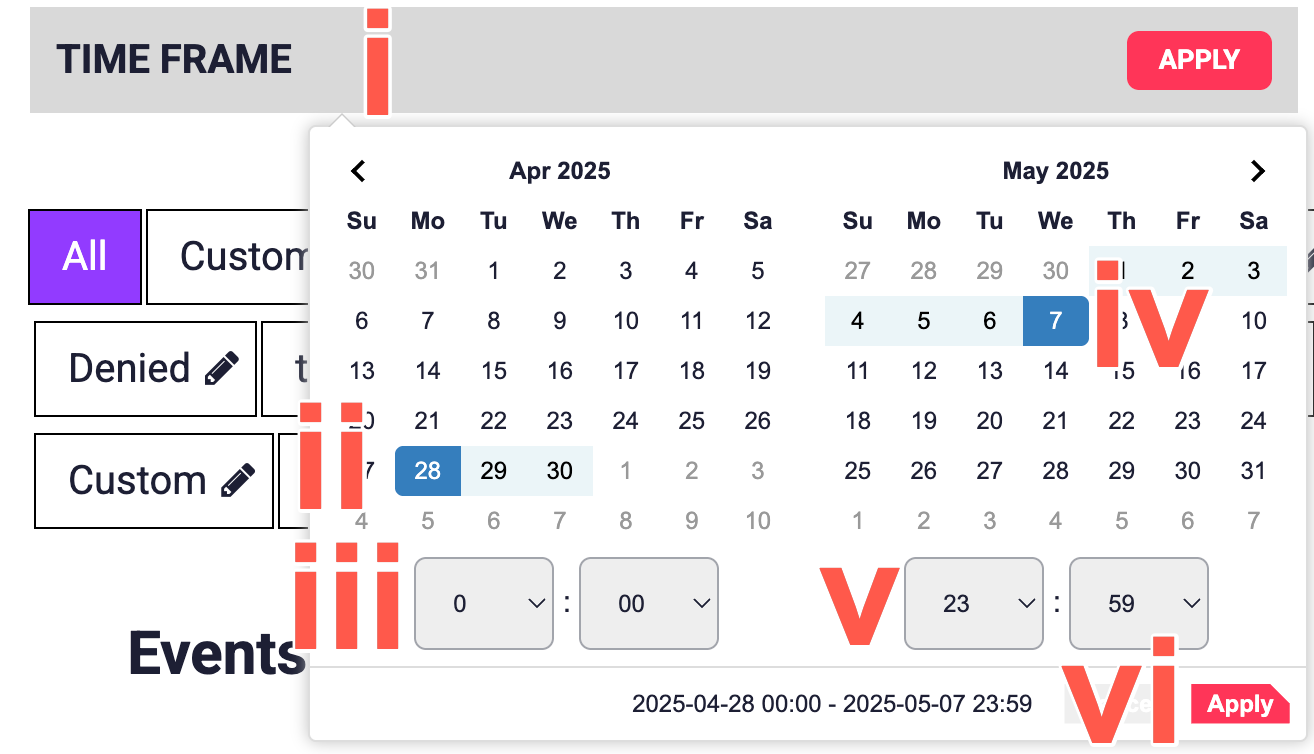
- Click the desired start date.
- Using the dropdown, select the desired start time.
- Now click the desired end date.
- Using the dropdown, select the desired end time.
- Click Apply to apply the desired date range filter.
- Click the TIME FRAME field, which displays a calendar date/time selector.
- Use the Quick Search field to search for specific words to filter your results by.
- Click one of your previously created filters.
- Alternatively, add a new filter by clicking Add Filter. Then perform the following steps when the Add Filter window displays:
- In FILTER NAME, enter a clear name for the filter.
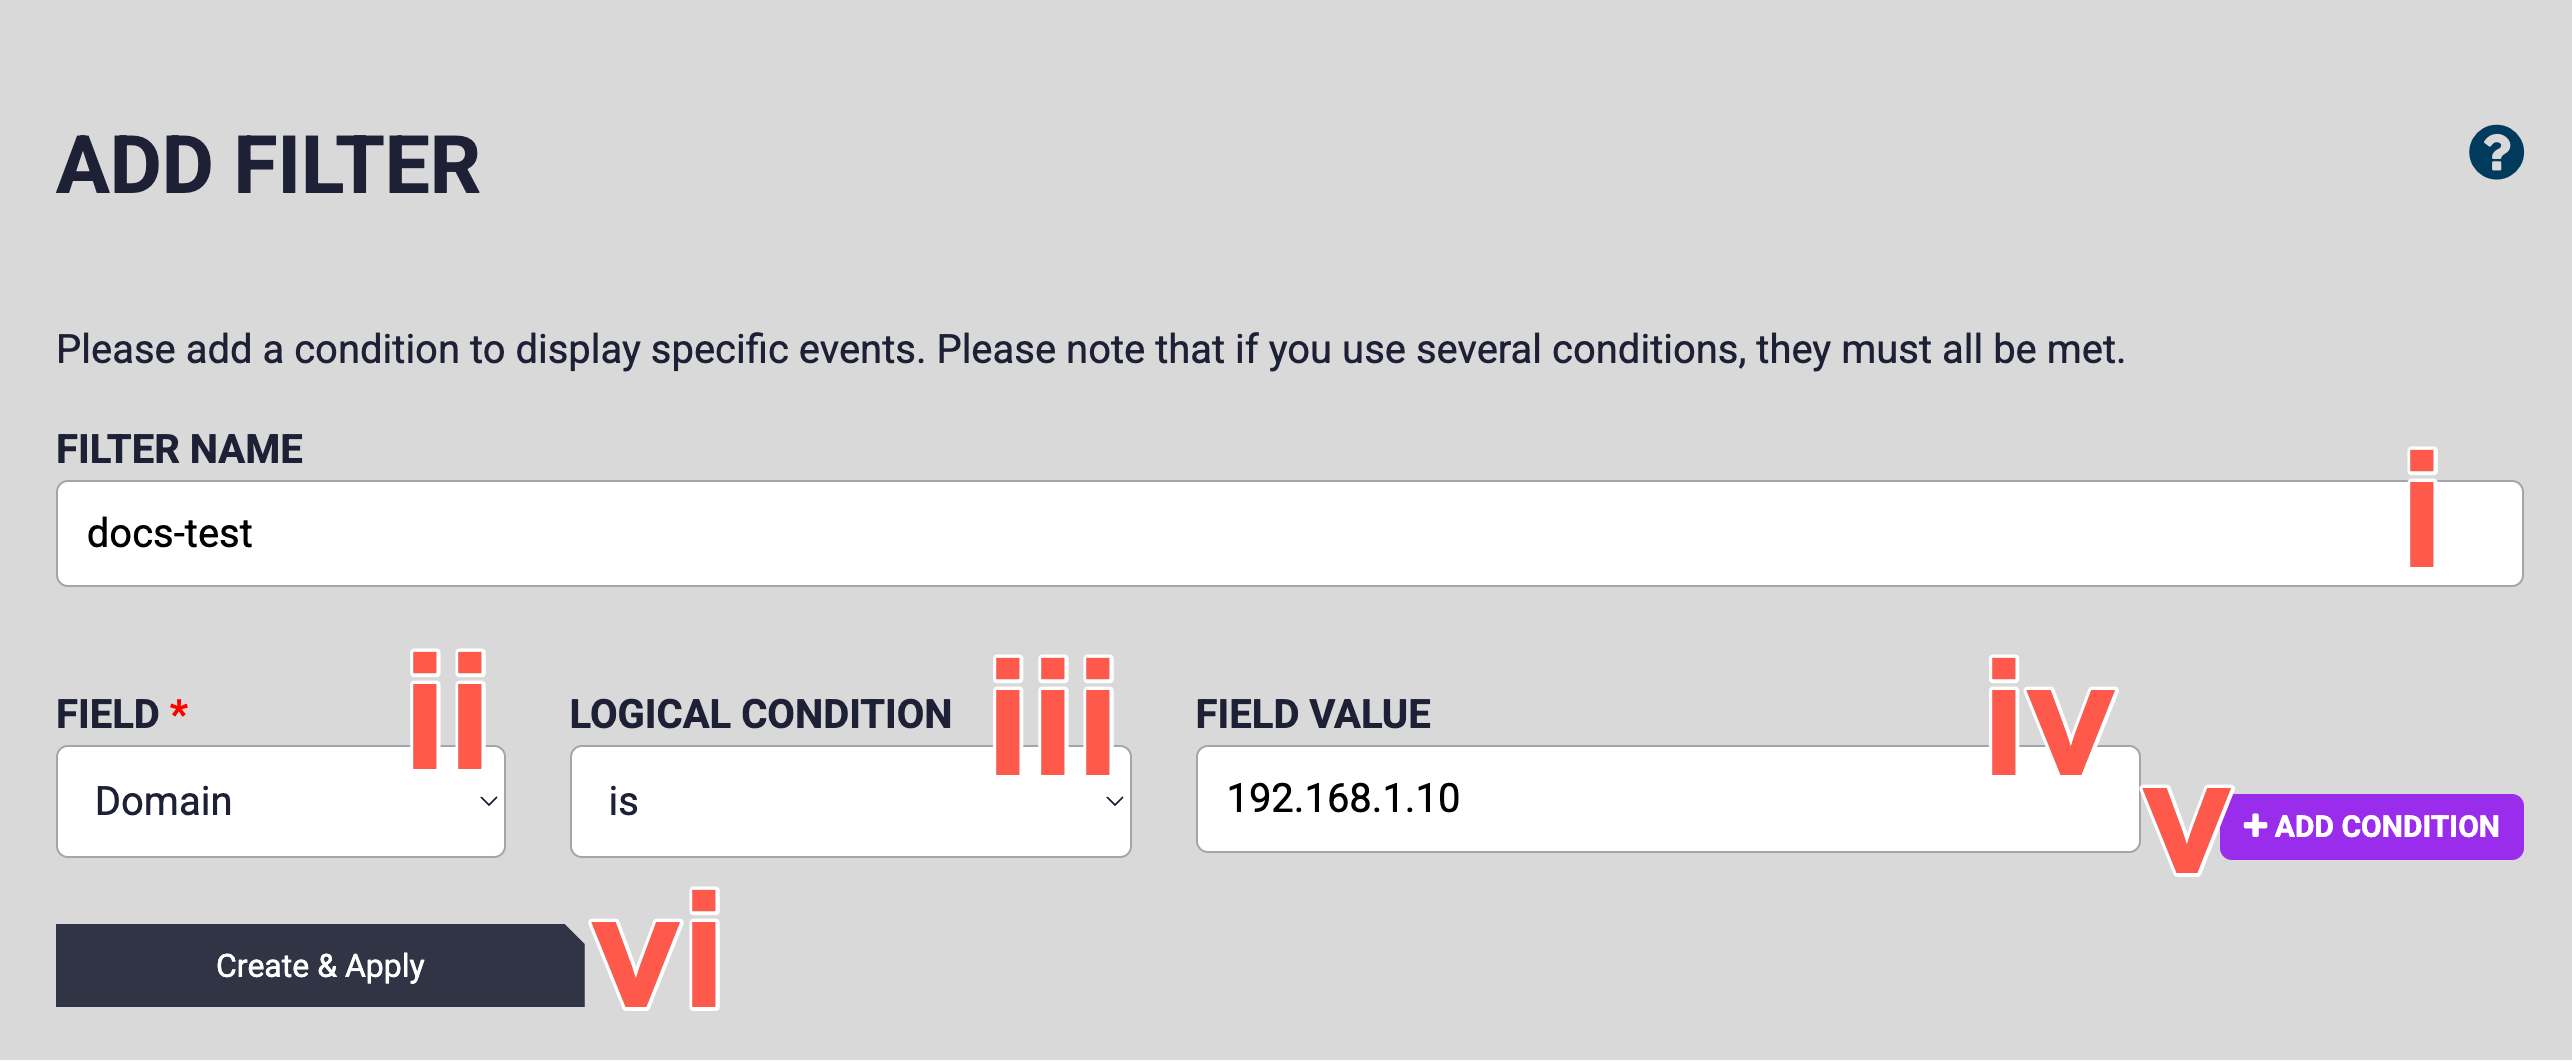
- In FIELD, select the event field that you want to filter by, such as Domain.
- In LOGICAL CONDITION, select how the field should be matched. For example is.
- In FIELD VALUE, enter the value that must be matched.
- Optionally, click +ADD CONDITION to add another condition to the filter and repeat steps 1-4 again for each additional filter. Repeat for as many conditions as you need.
- Click Create & Apply to save the filter and apply it.
- Ensure that The filter has been saved and is being applied banner displays.
-
In the list of previously created filters, locate and click your newly created filter.
If you add multiple conditions, all conditions must be met for an event to be displayed.
- In FILTER NAME, enter a clear name for the filter.
- Use the date selector to filter by date range: